Boba Fett helmet build - part 4 - Painting
19 Feb 2020
This build started some time around August 2019, and is wrapping up now in February 2020.
The bits that are green and red
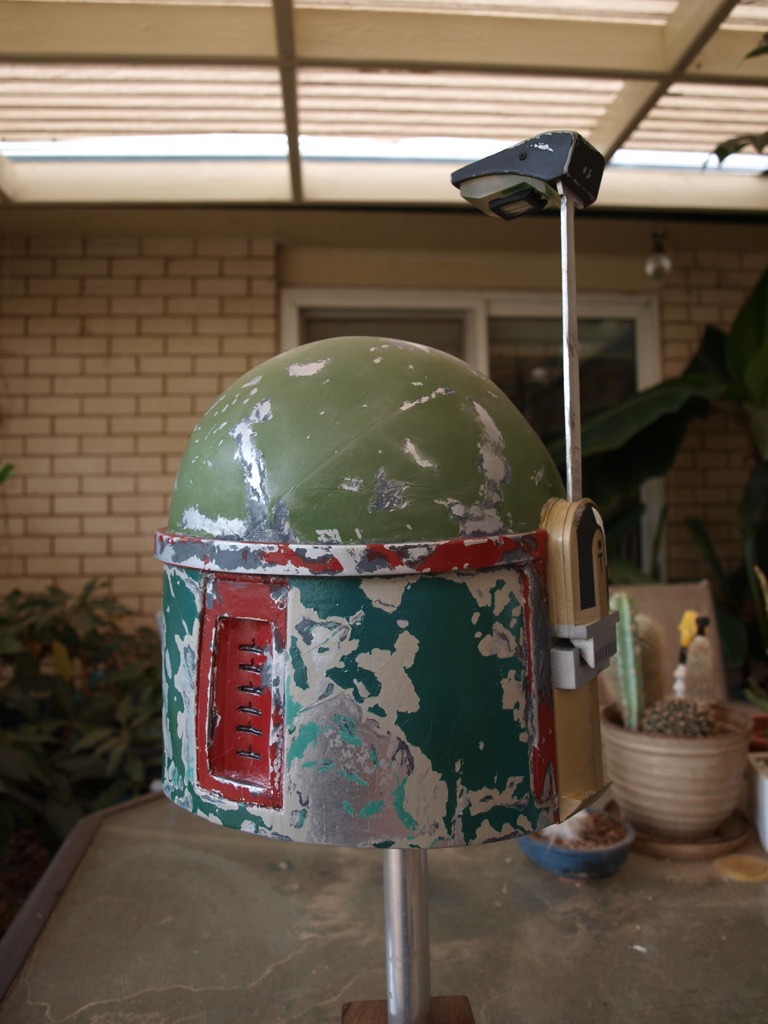
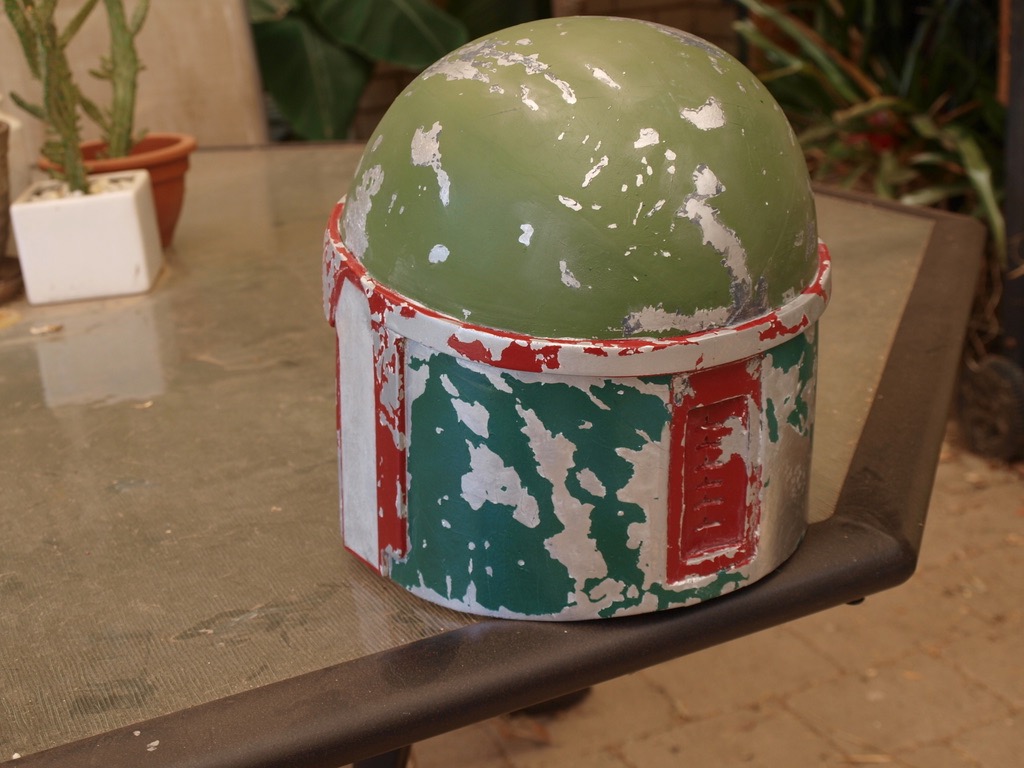
Who would have thought that painting something green would be so stressful. I'm not going for movie prop accuracy on this build, but I do stress over getting details right, and for me this meant trying to get the paint colour reasonably close. To do this properly, it's meant to be 'German Field Grey' or 'Panzer Olive Green' on the top and front of the helmet, and 'RLM73' on the back. I've not got an airbrush setup, so I had to rely on whatever spray paints I could find from the hardware store.
I started with a Brunswick Green, and that was way off. Oh well. I then found a can of Matt Grass Green, which I tried to lightly spray over the top... but the nozzle jammed, and I ended up with a solid stripe. At this point I gave up on trying for exact colours, and just covered the whole lot in the Matt Grass Green. No one is going to know but me, or any pedantic Boba Fett helmet builder who happens to see it.
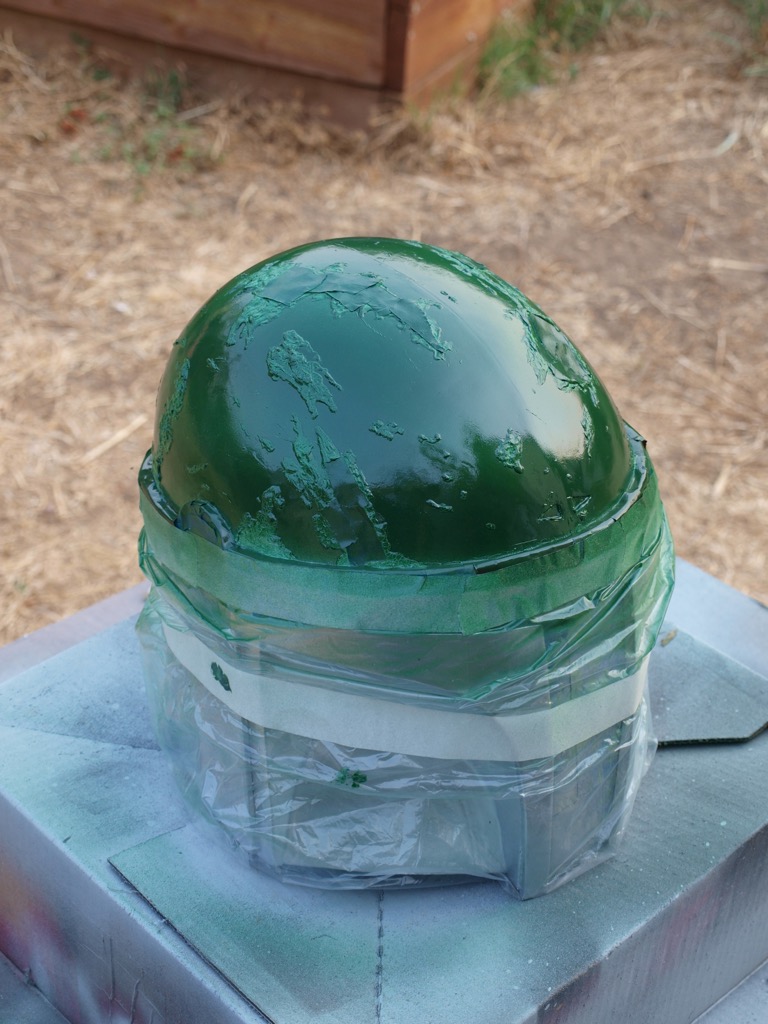
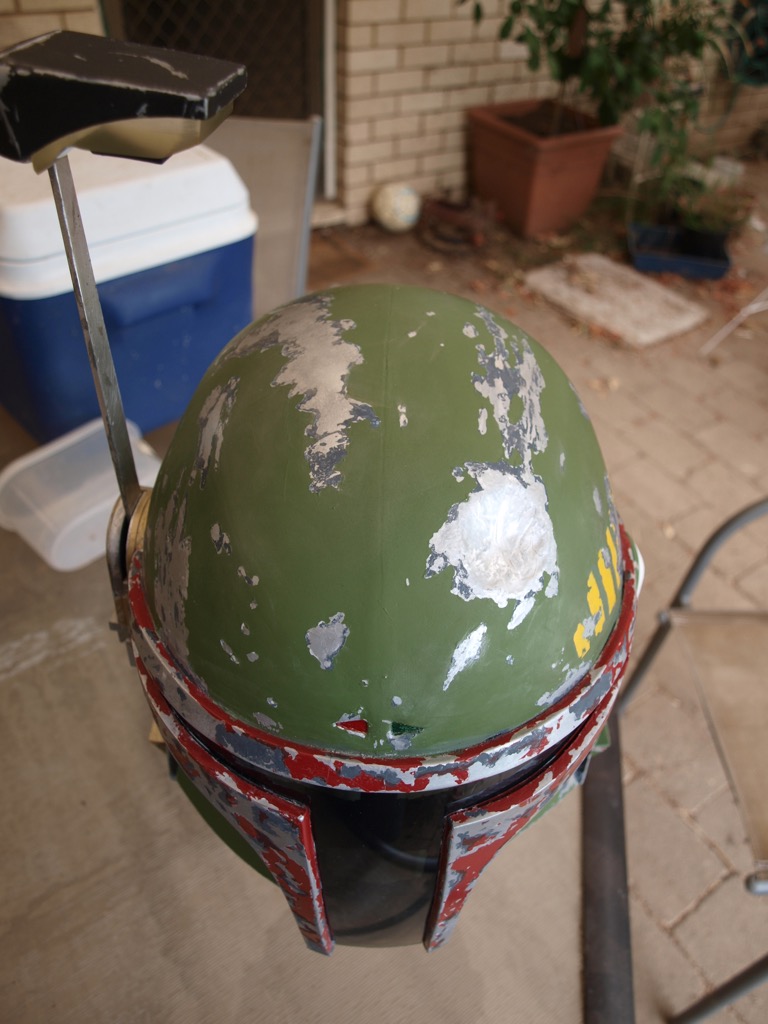
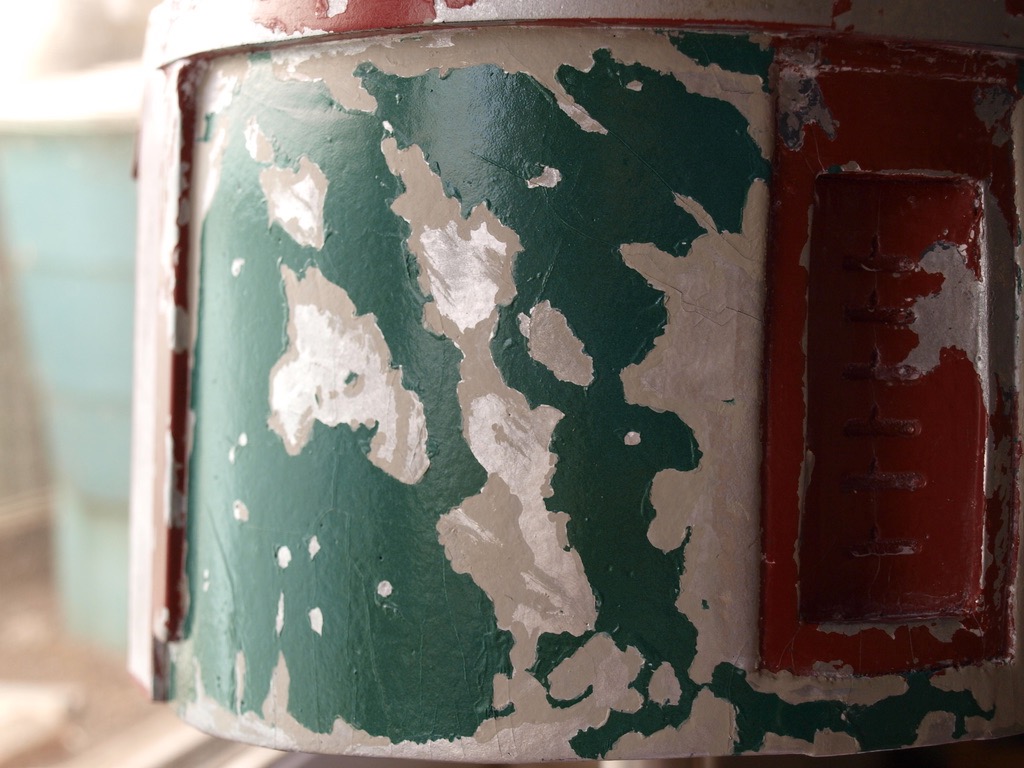
Once the colour had dried, I scratched off the toothpaste to show some of the silver underneath. Having left the toothpaste on way too long, this took a bit of effort, and it also discoloured a lot of the dark grey that I'd put on.
The end effect is pretty amazing - this would have to be the most fun you can have with some floor mats, contact glue, and a tube of toothpaste.

Not quite happy with the amount of dried toothpaste that was left on the helmet, I tried a few things - painting over it with more paint, or using a silver pen to go over it worked fine. I tried some shellite (it's basically lighter fluid), which is usually great for cleaning up paint. That worked a treat on the toothpaste, but it also smeared the silver pen all over the place. That... was less than great.
For later colours, I found that putting the toothpaste on for no more than an hour before painting, and taking it off with a wet rag within an hour after painting worked really well.
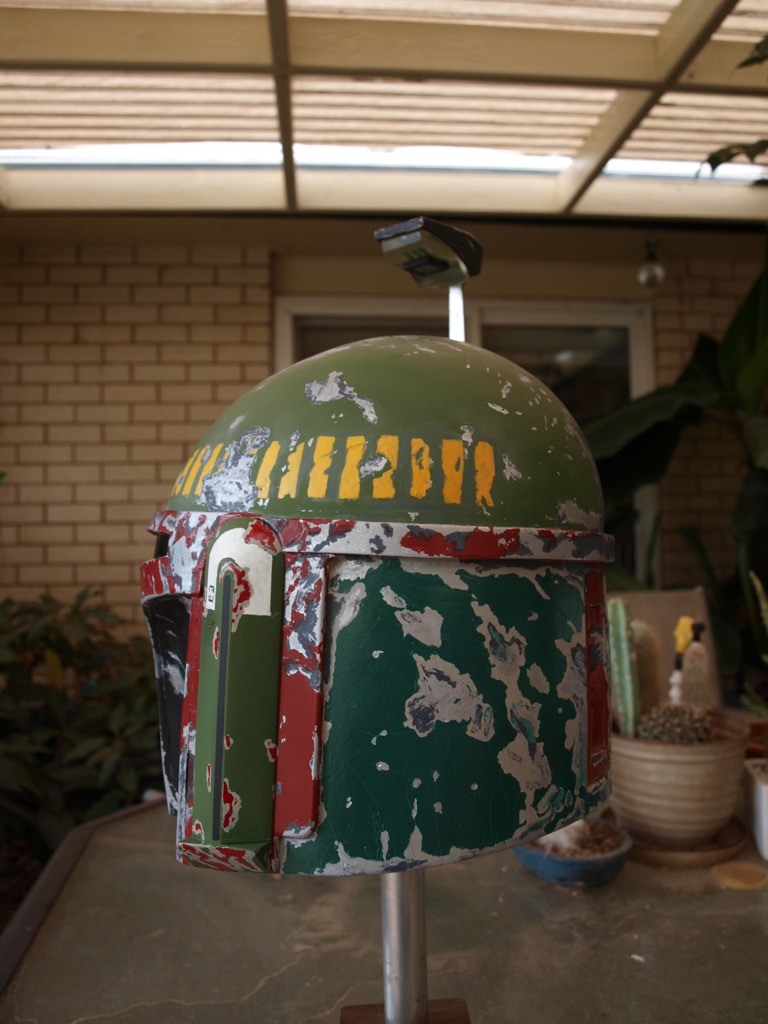
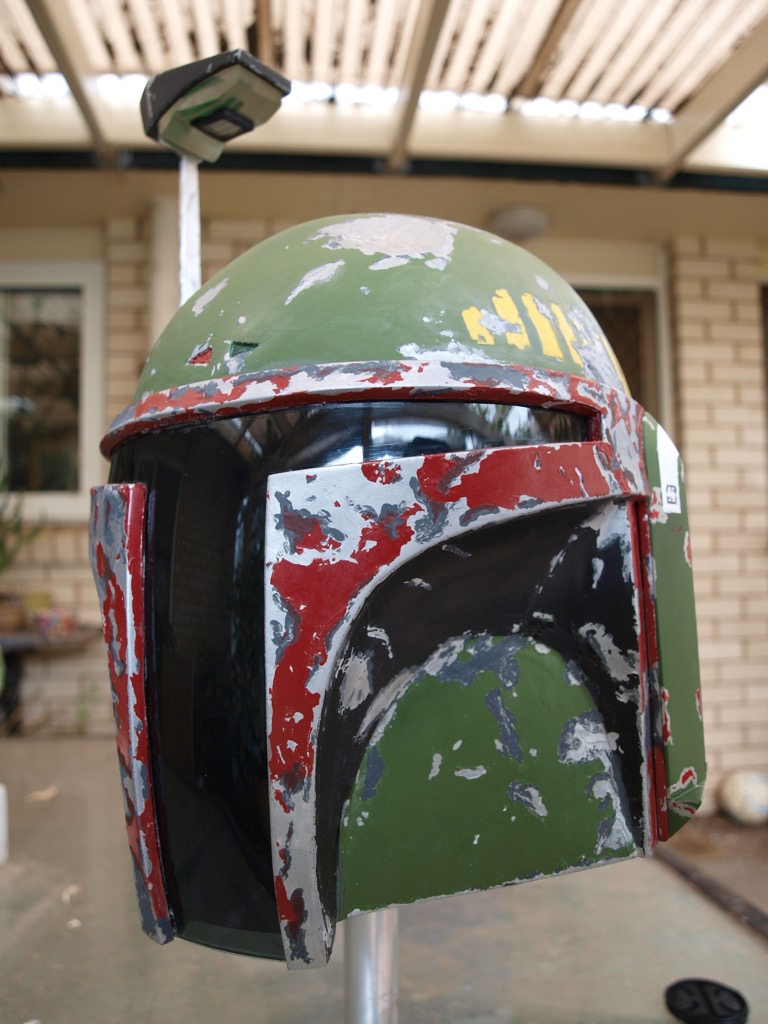
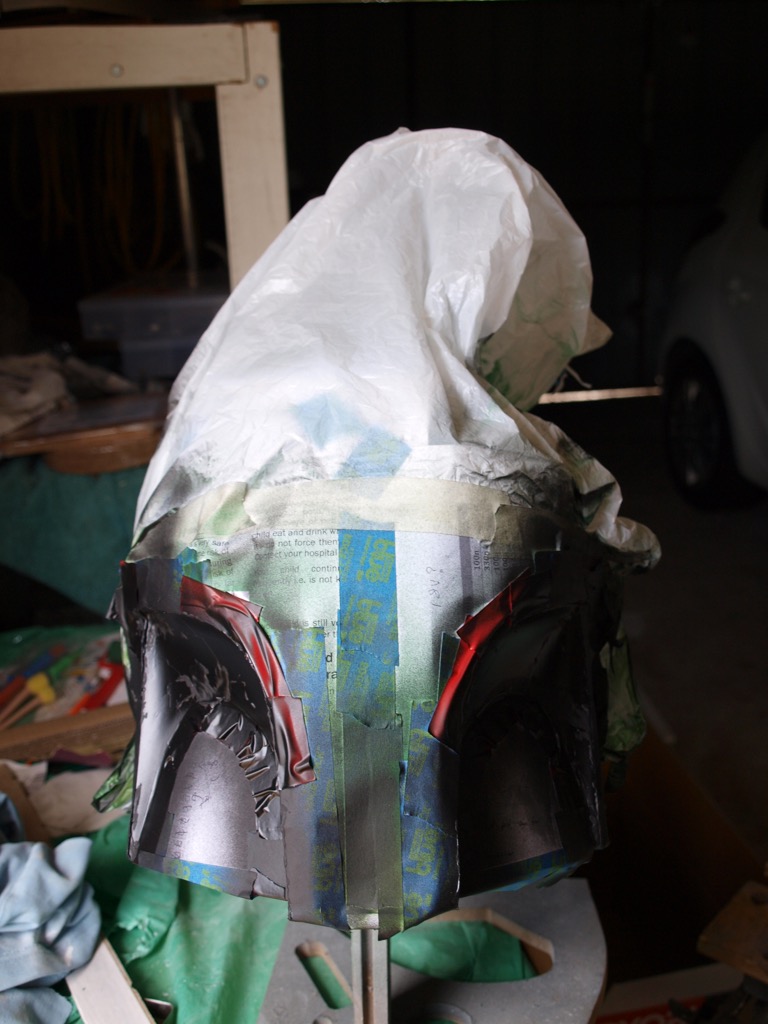
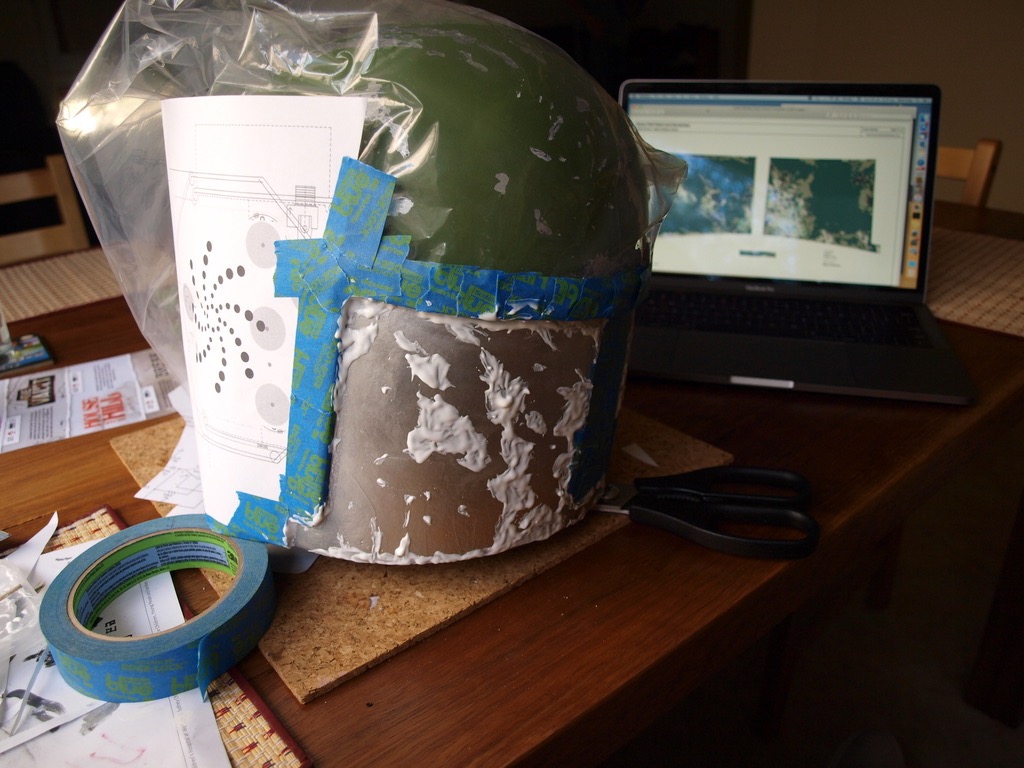
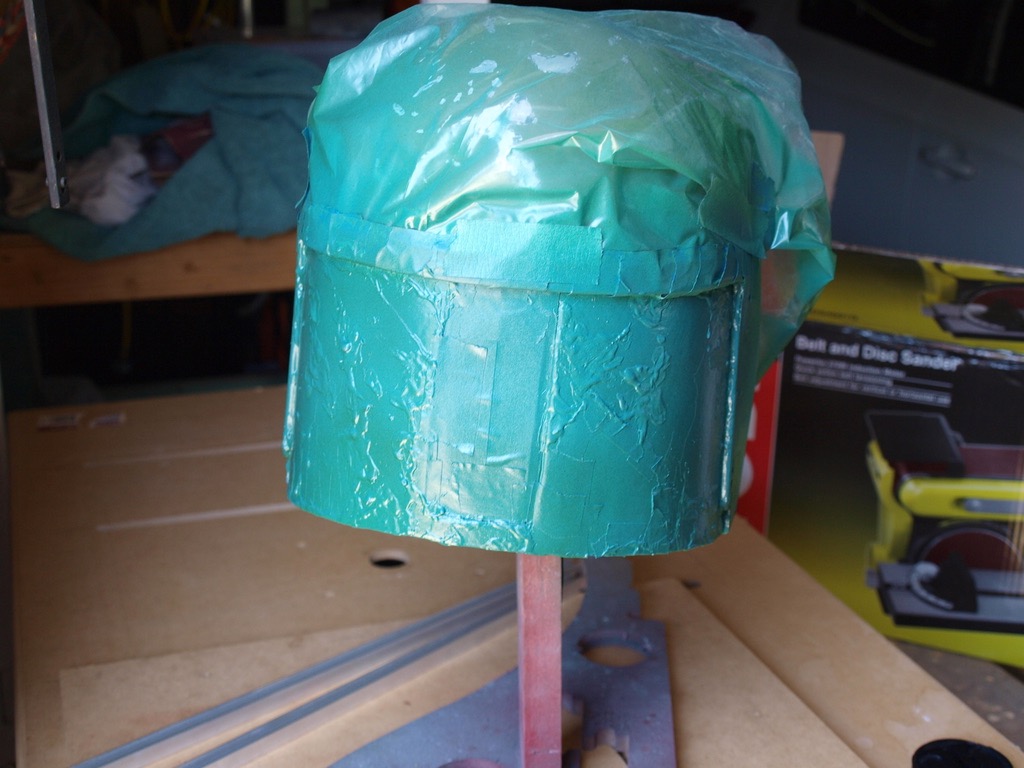
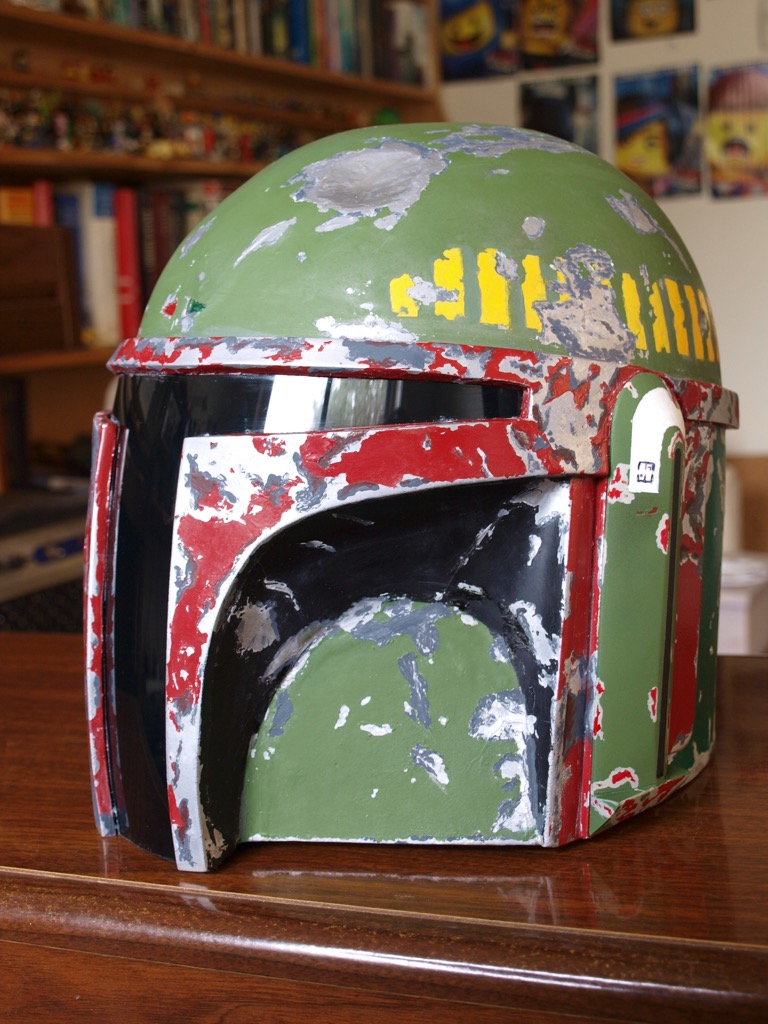
The next step was to mask off and paint the green on the front, as well as the black above it. Masking with a plastic bag worked well, and had the added bonus of producing "Boba Smurf" for a few hours.

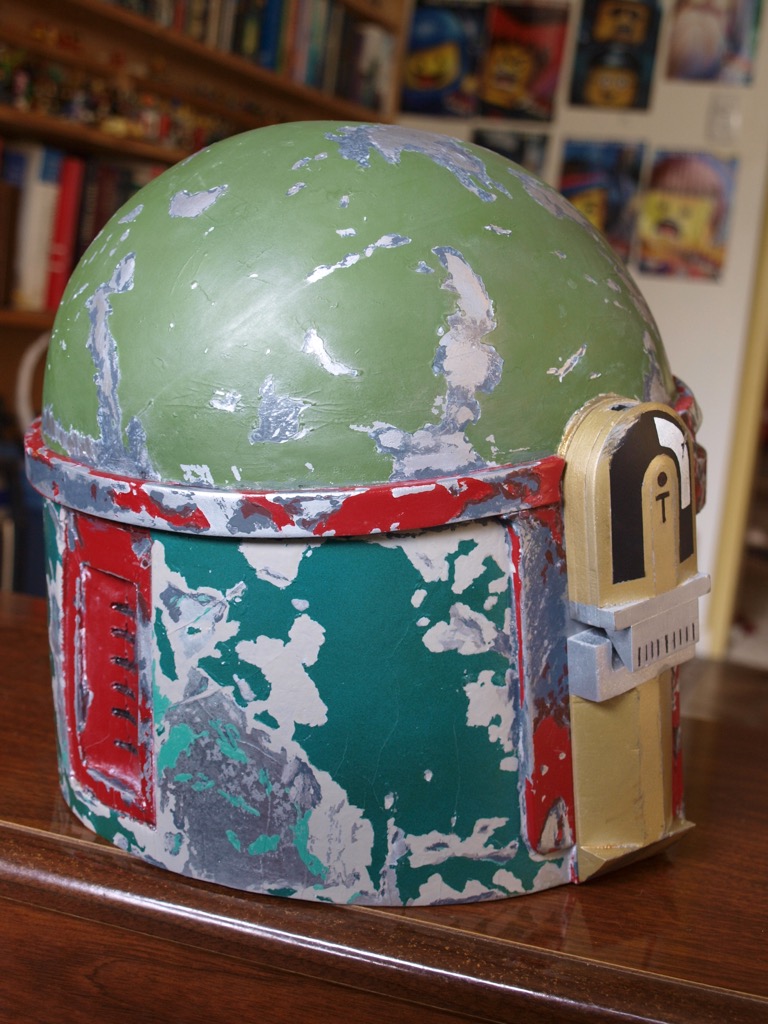
On to the back. This is a different shade of green. I grabbed something called 'Teal Bean' from the hardware store, and it came out OK, once I'd toned it down with some of the Brunswick Green over it.
I tried to follow the official paint job with my toothpaste, but in the end I wasn't super pedantic about it.
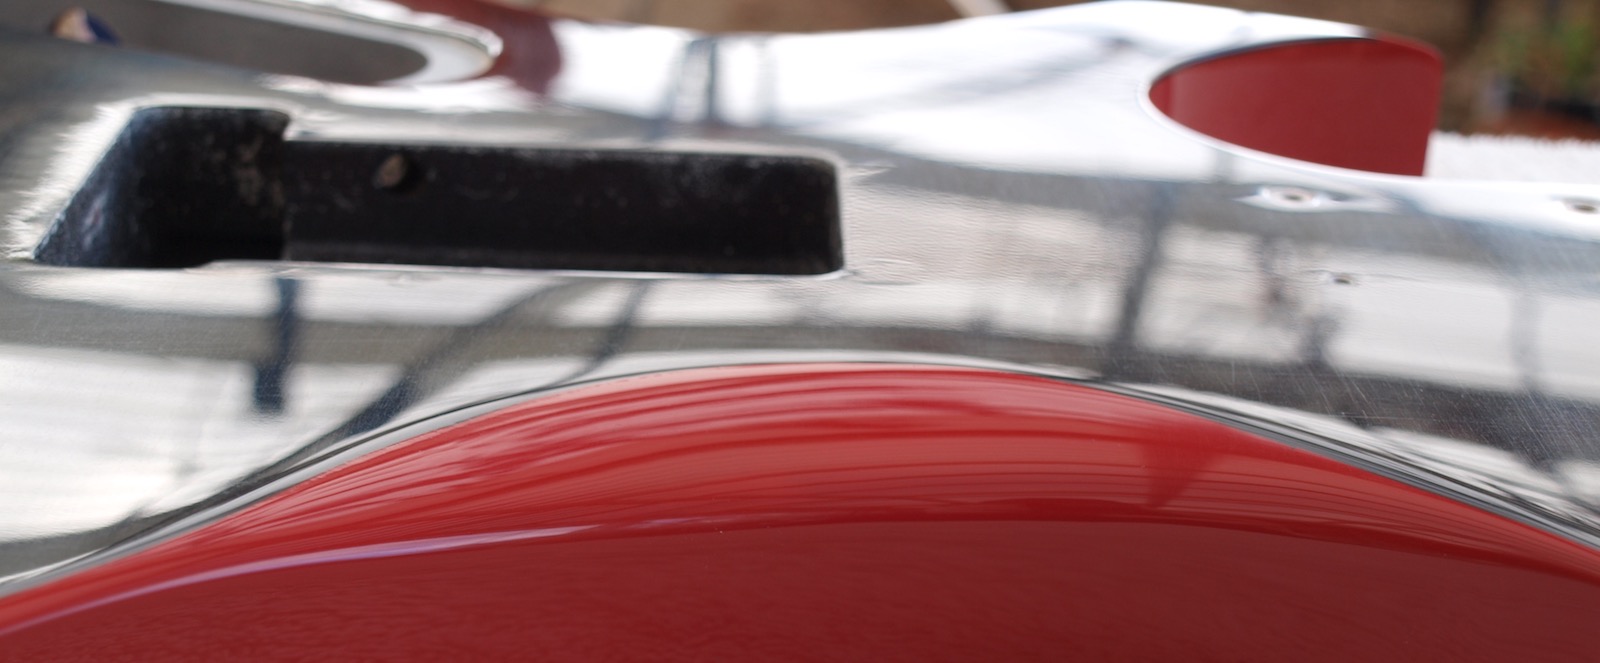
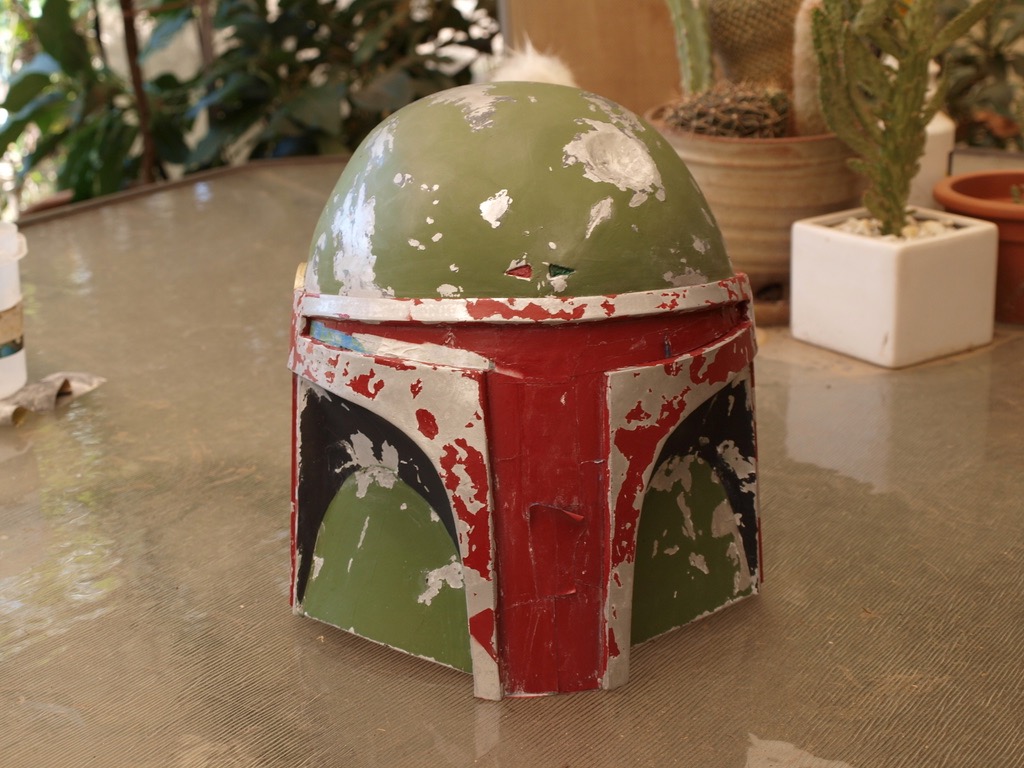
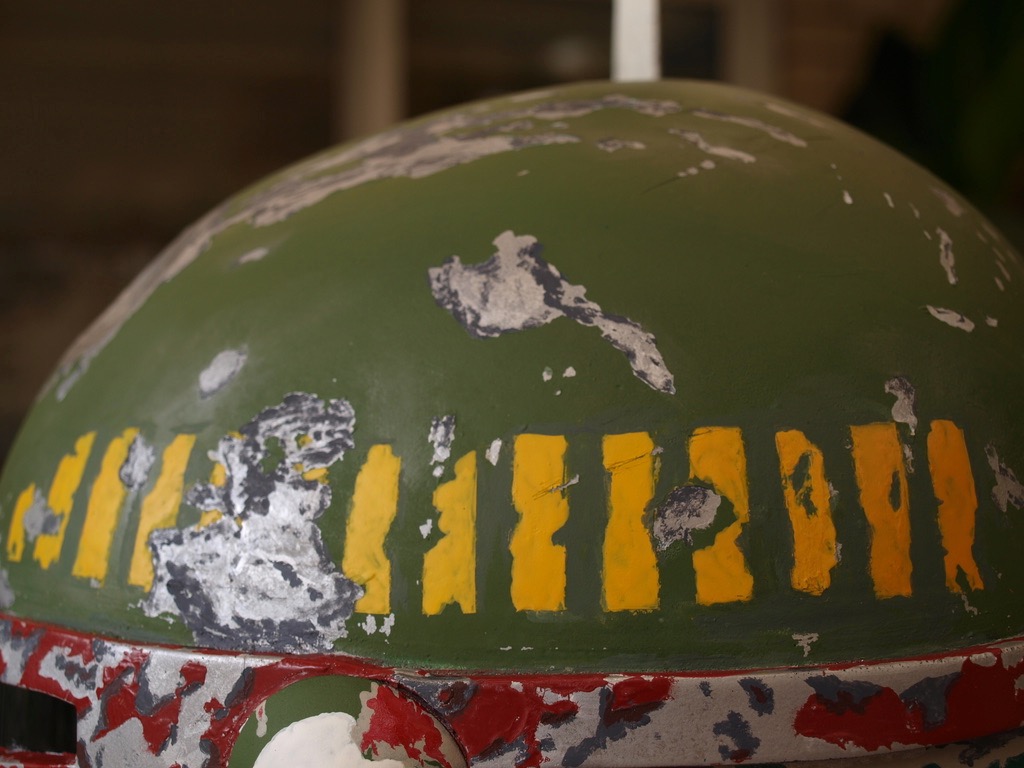
Finally, more toothpaste and this time some red paint - again from the hardware store, 'Colonial Red'. Close enough. If I had realised in advance how litte of the red stays on the helmet (most of it is peeled off to show the silver), I might have tried to get a smaller can!
Colour details
There is a surprising amount of colour on the Boba Fett helmet. The back has a concrete grey and dark grey under the green, but over the silver. There's also a mint green on the back in parts. The red sections of the helmet have dark grey and a darker red highlight. The green parts of the helmet have dark grey, and then there are stripes on the left side, which go from yellow to orangy-yellow as they get further towards the back.
I was lucky enough to have a friend who did a lot of model painting, and he was keen to offload all of his paints to clear up some room at his house. I ended up with every shade of green and grey imaginable, and then some.
All of these colour details were done by hand with a small brush, in late January and early February 2020.
Assembly
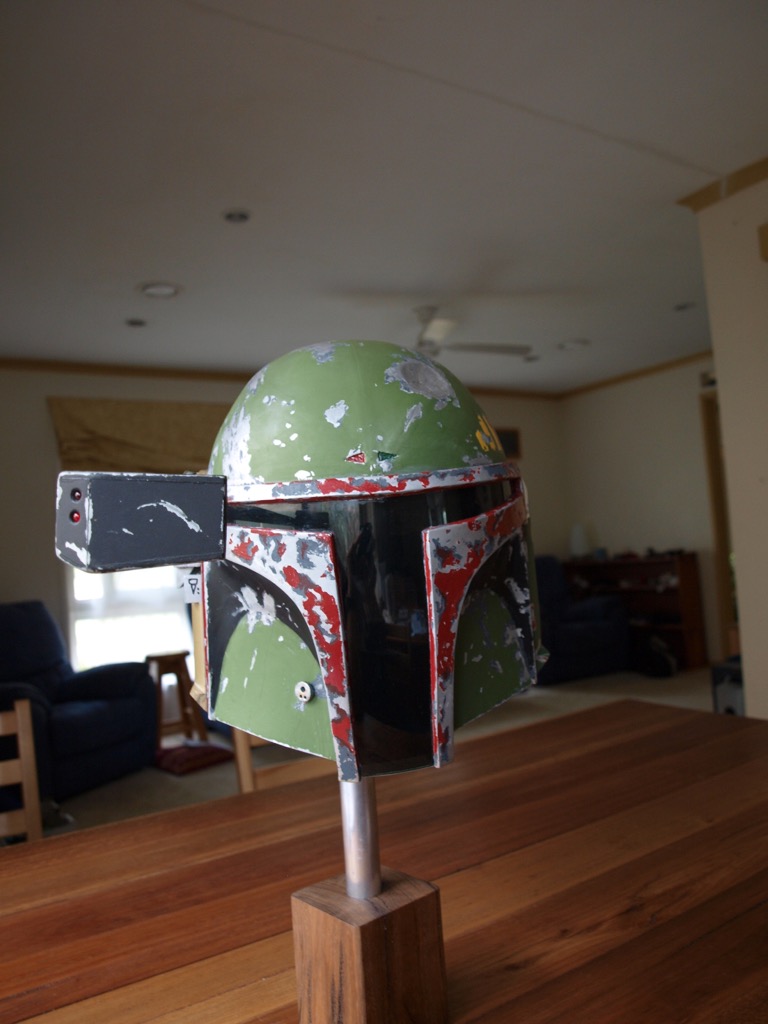
Nearly done... time to put some things together. The ear pieces were glued on, and the range finder bolted in place. There's a tiny little round 'communicator' piece that goes on the front right, so I made that from foam and painted it silver/gold.

Basically the last thing I have to do is to weather it some more, by putting some dark/dirty paint wash over it, to make it look more used. I'll do that at some point in the future, but for now I'm giving this a rest.
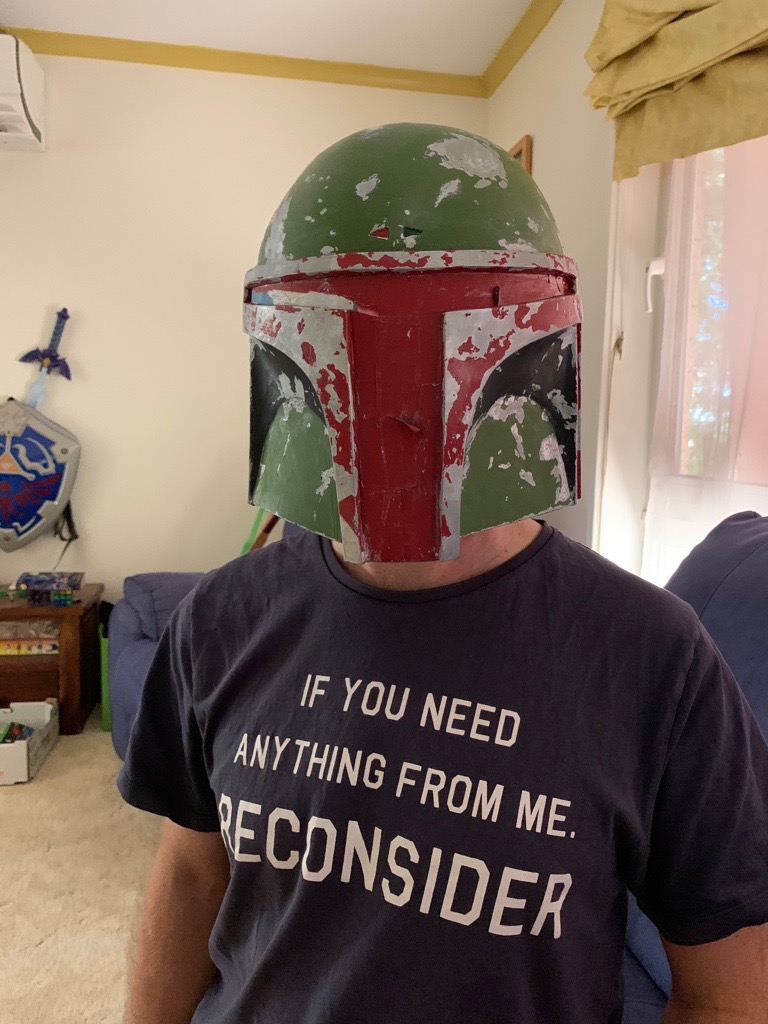
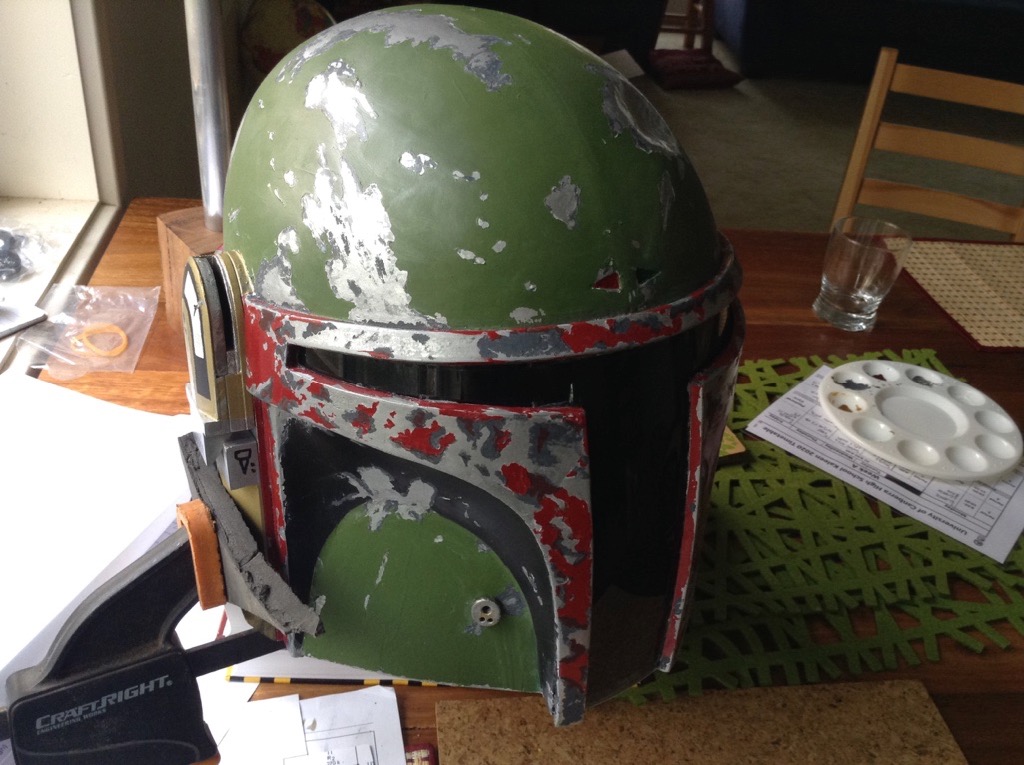
Some nearly finalised glamour shots: