Boba Fett helmet build - part 1
7 Feb 2020
I've been caught by the foam prop building bug now, and have decided to try a Boba Fett helmet. Originally I was thinking about a Sabine Wren style helmet, which led me to this guy's YouTube channel. He's also got an excellent walk through of Boba Fett, so that's where I've decided to start. (Given how much I hate doing paint jobs, Boba Fett is probably a better place to start anyway - if it gets scratched, dented, or stuffed up in any way, just claim it's meant to look like that!)
I also picked up some good tips at GammaCon this year, by attending a few prop building workshops. Time to put some of them into action.
This build started some time around August 2019, and is wrapping up now in February 2020.
Foam building
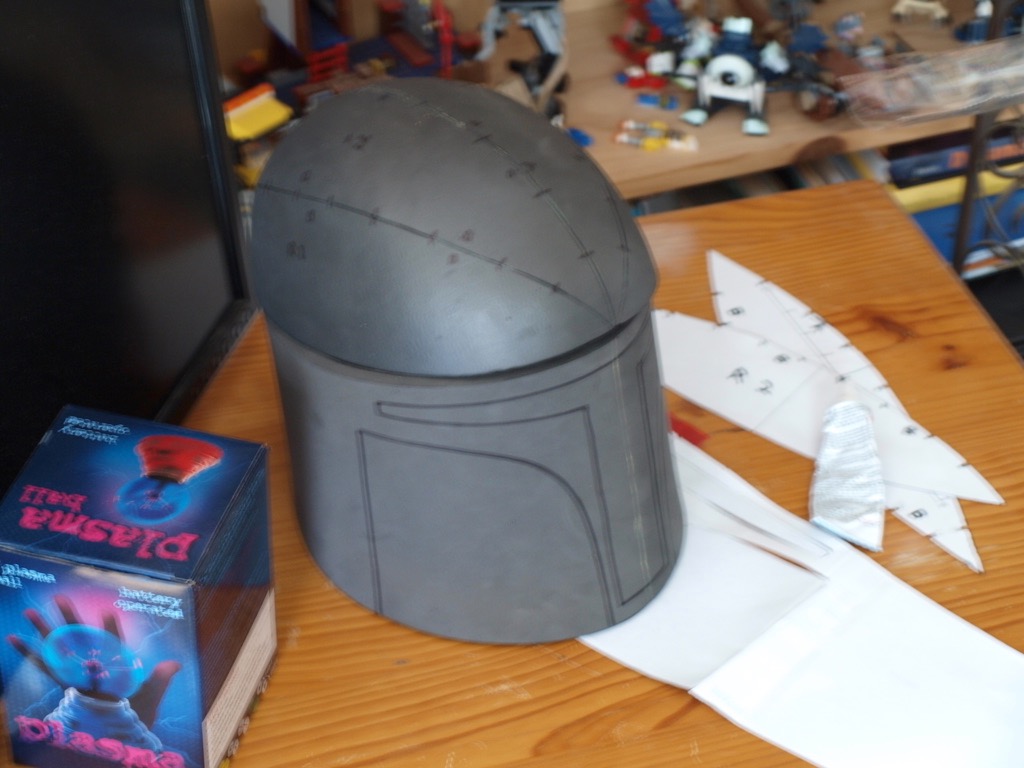
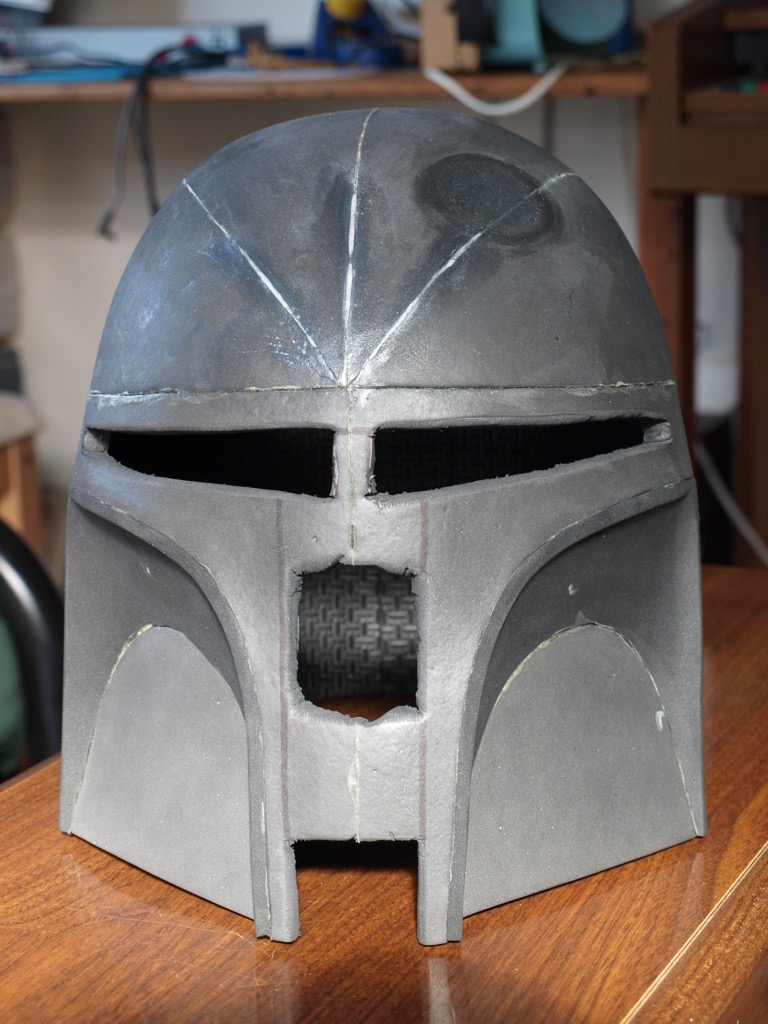
I still find it amazing that you can take some foam floor mats, a heat gun, some glue and some paper templates, and turn it into a helmet. This is just too much fun.
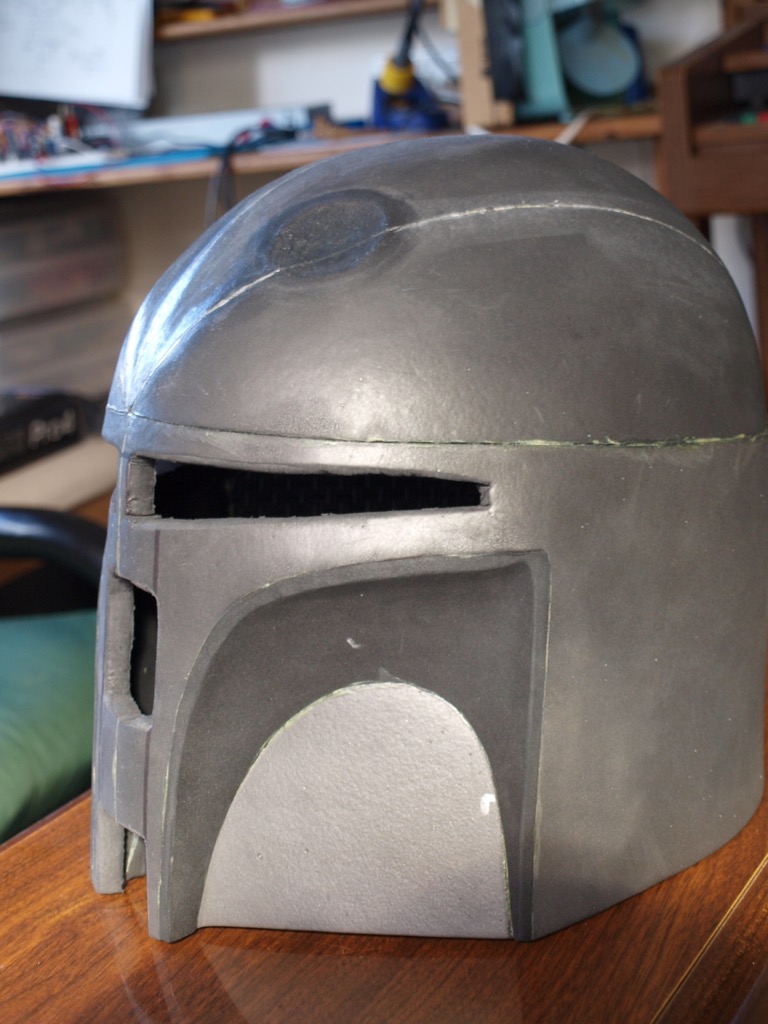
Using the templates from the YouTube channel (link above), I cut the parts out from 12mm and 6mm foam. The dome is made of four parts, which are curved after heating. The main walls of the helmet are then cut to fit the inset parts, and holes cut for the eye slots. Some dremel work takes care of the 'dint' in the top left of the helmet.

Visor
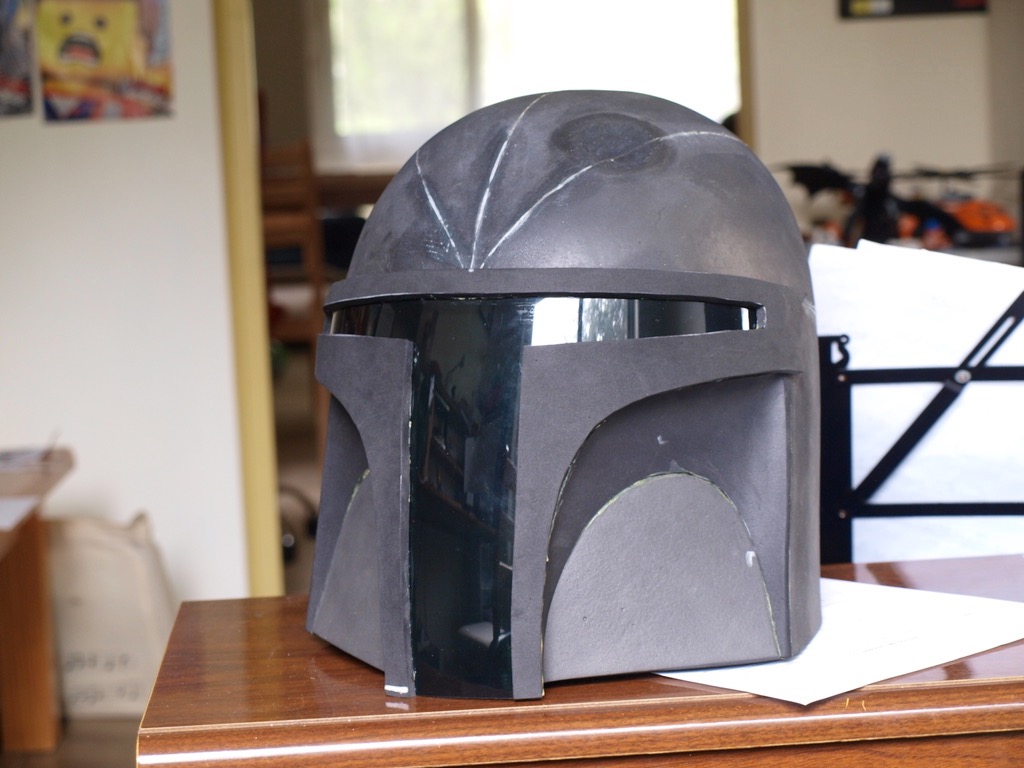
Next, the visor material went on. I've seen other people use a thin flexible material for this, but I couldn't seem to find any here in Australia or on eBay. Well, nothing for a price I was willing to pay.
I have used a thicker face shield instead - a perspex tinted full face shield, which I've cut to shape using a dremel tool. I had to order two of them - the first one from China arrived with a few big cracks right down the middle, thanks to poor packaging. The 2nd one was from a local supplier, which was more expensive, but at least it arrived in one piece.
The upshot of waiting for something to arrive from China, then having to reorder it, is that not much happened for September. It was the middle of October before the visor was ready to go on.
The visor is then covered with another section of 6mm foam. Having seen how this turned out, I think it would have been better to inset the visor somehow - maybe make a recess into the foam underneath. The thickness of the visor has ended up bending the foam above it, so some of the lines are not quite right. It'll do though.

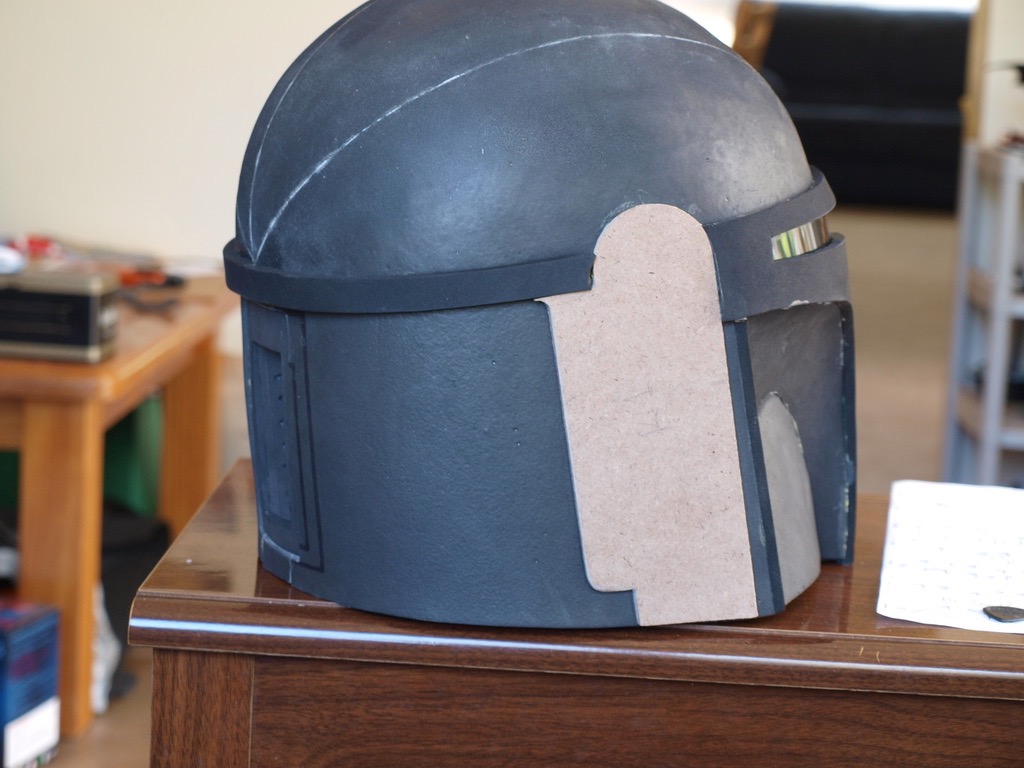
Ear pieces
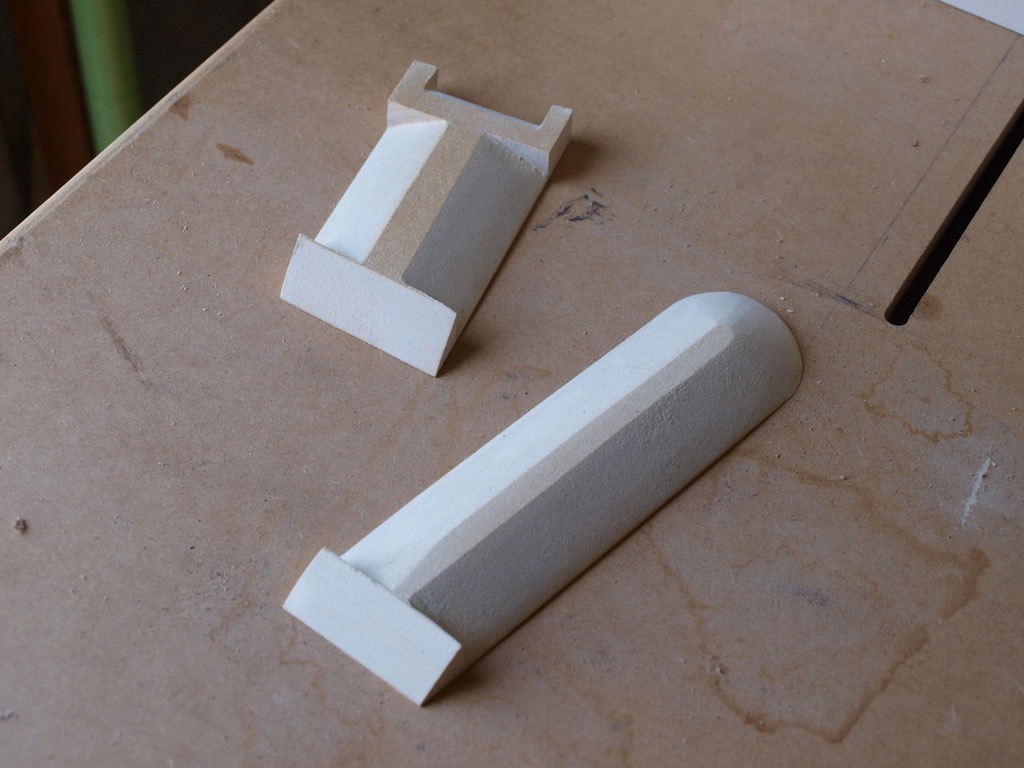
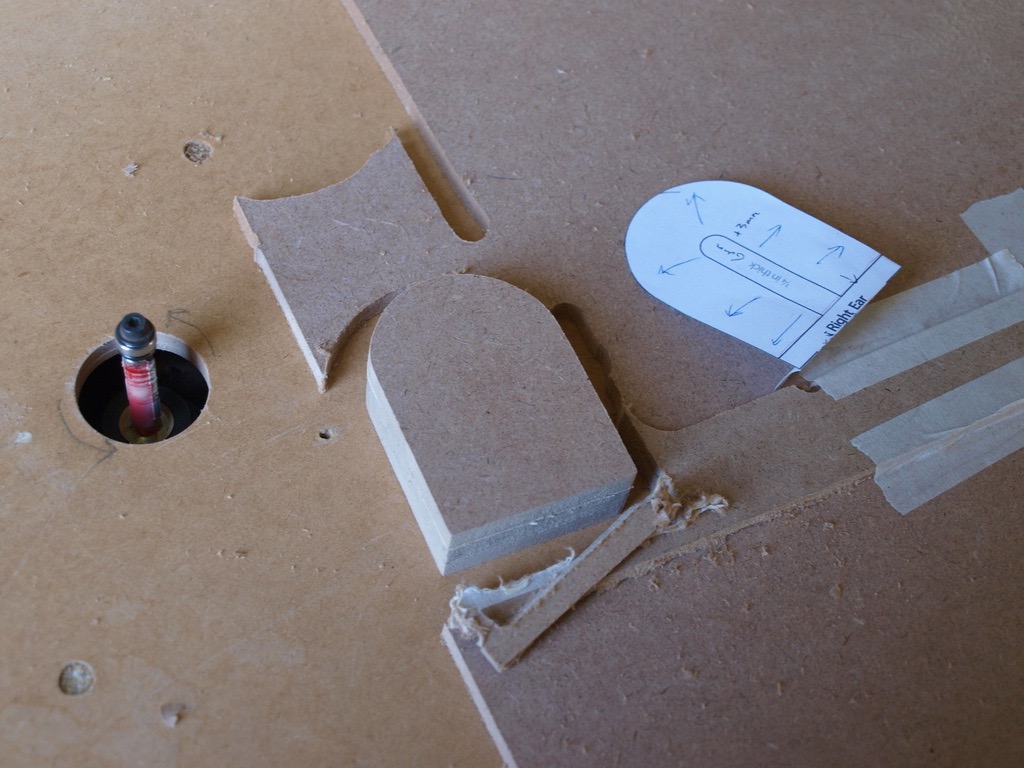
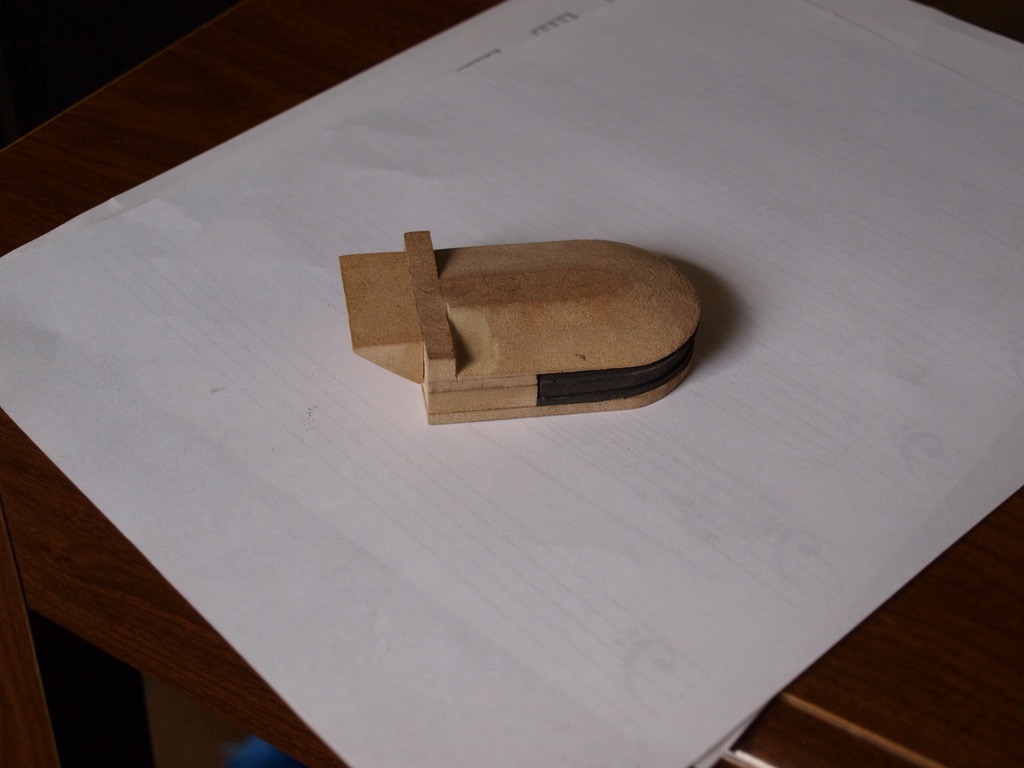
By October 2019, the ear pieces for the sides of the helmet have been made from MDF wood, routed to get the basic shape, and then finished with a rasp, file and sandpaper to get the curved sides.
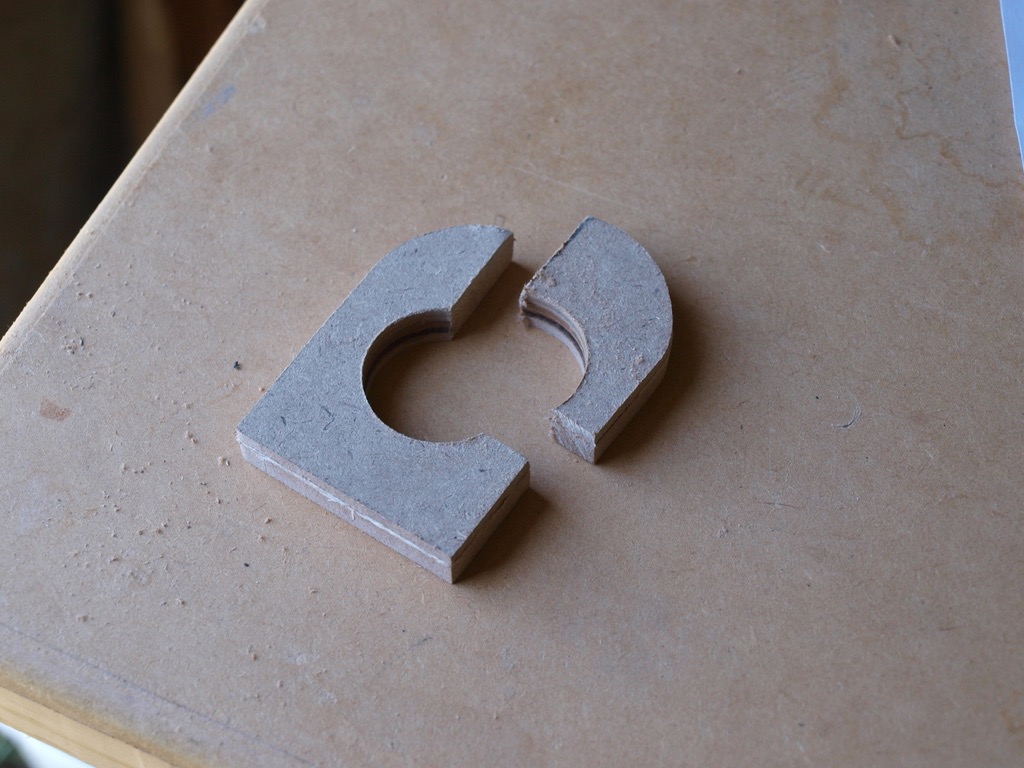
The right ear is an interesting piece, in that it has to hold the range finder stalk. I have made it using two pieces of 6mm and two piece of 2mm MDF, all routed together to get the shape consistent. The inner parts are then drilled and cut to form the area where the range finder stalk will fit and rotate, with some foam to add friction.
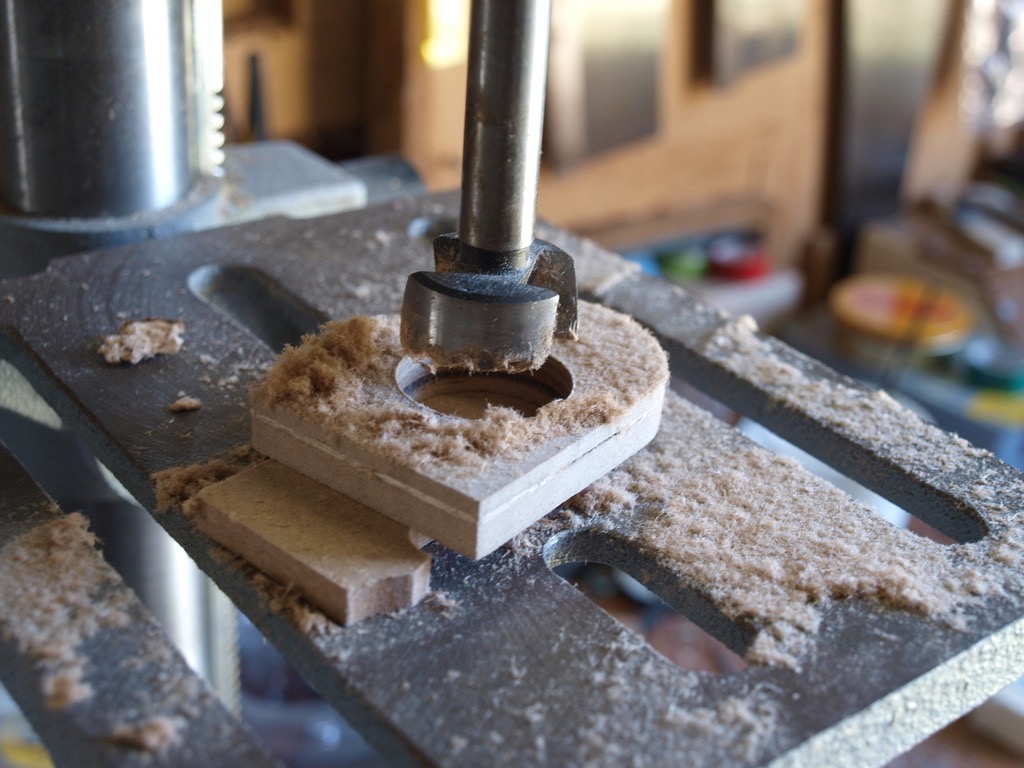
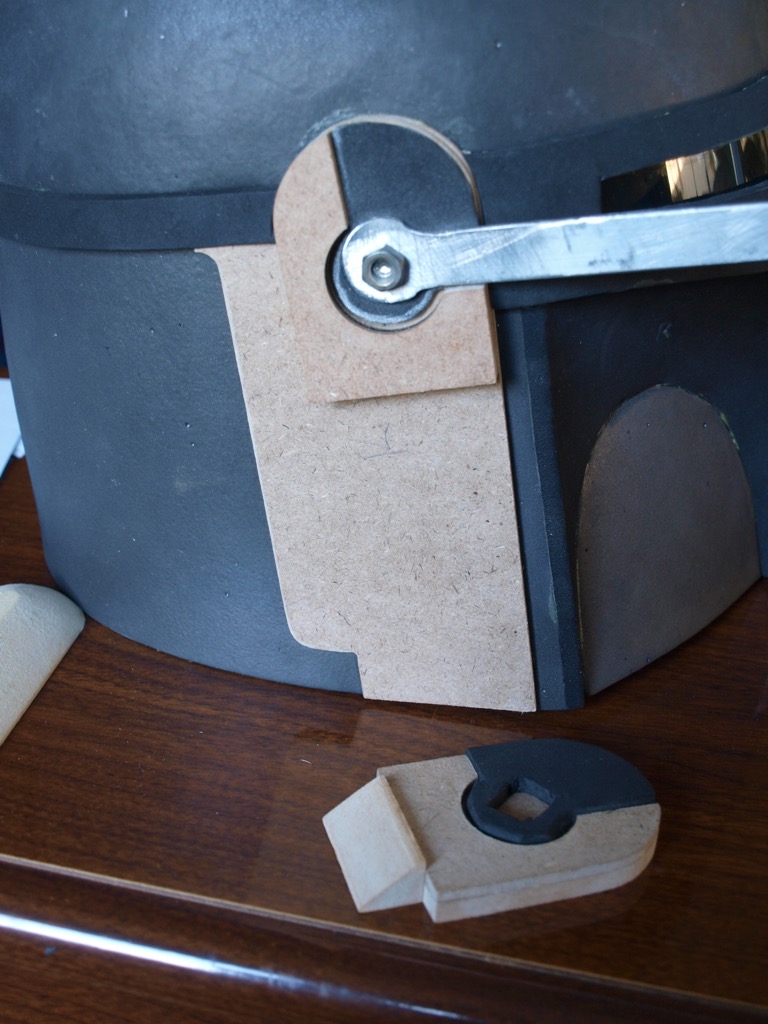
The top section is then curved, and another triangular piece is glued on the bottom. Some small neodymium magnets are used to hold everything together, but still allow removing the range finder if needed, which will make painting much easier later.
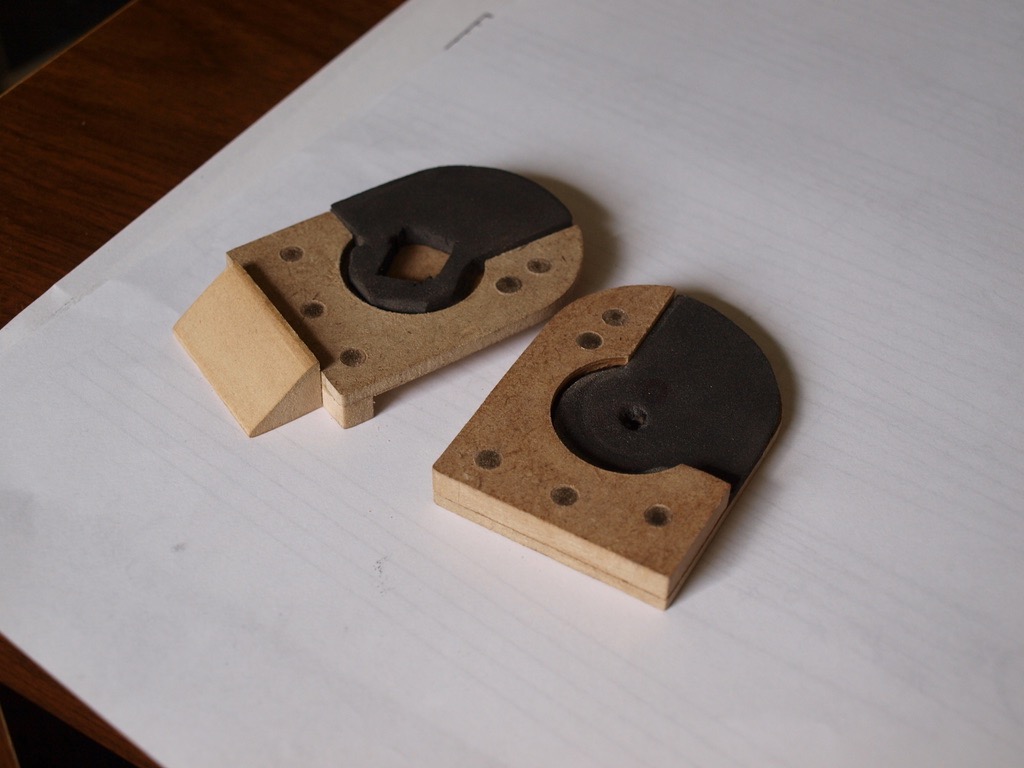
The left ear piece, and the bottom of the right, are made from thicker MDF, and again shaped with files and sandpaper. Then some 3mm MDF has been used to make the base parts for the ear pieces.